How To Apply Thermal Paste on CPU – The Right Way
What is thermal paste?
Thermal paste is a substance applied between a computer’s CPU and its heat sink or cooler. Its main job is to fill tiny gaps and imperfections on the surfaces to ensure better heat transfer from the CPU to the cooler. This helps keep the CPU at a lower temperature, improving performance and preventing overheating. It’s essential for efficient cooling in both air and liquid cooling systems.
Thermal paste, that thick, gray goop that you find in tubes, is a mainstay for desktop enthusiasts. That’s because even though the processor’s integrated heat spreader (IHS) looks completely flat already, it’s not. Not where it counts, anyways. At a microscopic level, the surface of a modern silicon chip isn’t uniform at all, which presents challenges for a cooler where complete coverage is a primary concern. Thermal paste maximizes the heat transfer from IHS to the cooler and seals any small gaps of air that may be introduced by the uneven IHS.
In the liquid cooling business, our goal is to keep CPUs uniformly cool, without overheating. Especially with heavy use, the last thing anyone wants is for performance to drop consistently…or permanently, which will adversely affect some gameplay FPS, digital rendering, encoding, or other heavily CPU-bound processes.
That’s where thermal paste comes in. The viscous substance fills those gaps and grooves to better extract heat from the CPU. This allows our AIO liquid coolers to dissipate that heat more effectively. So, “How much of this messy stuff does one have to use and how do you apply it,” you ask? Do you spread it, dot it, or smear it like butter? Here’s a quick step-by-step instructional on how to apply thermal paste the right way.
1. Clean off the CPU
Whether you’re removing old thermal paste or just dust, the worst thing for your CPU is to have gunk between the chip and paste. So wipe it off with an alcohol swab or wipe.
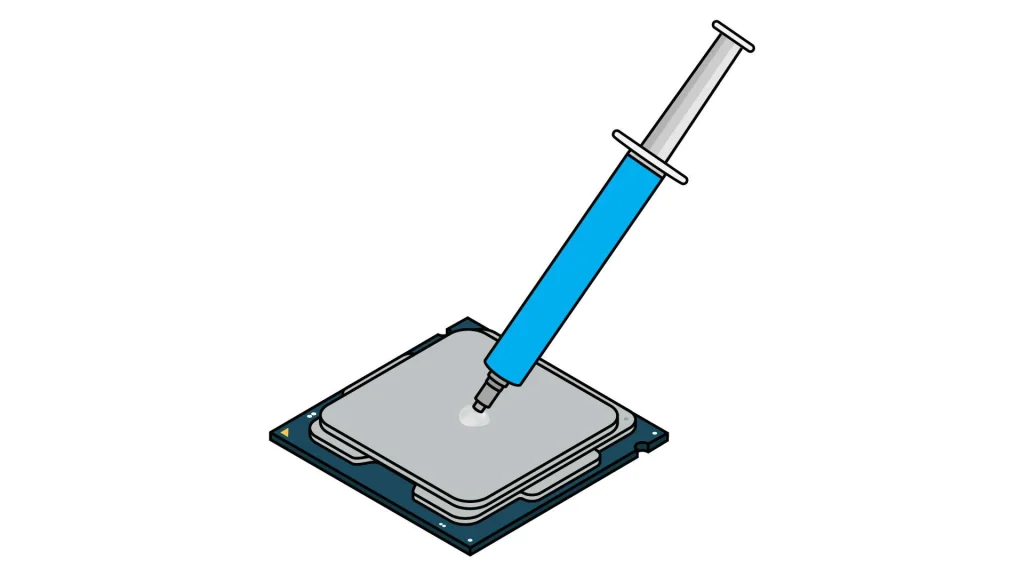
2. Squeeze out a pea-sized amount of paste on the center of the CPU
The preferred method of applying thermal paste is the dot method. Squeeze out a small amount about the size of a pea (or a corn kernel, or the head of a tack) onto the middle of the chip.
3. Install the AIO head onto the CPU
Straight down: we want to evenly distribute the paste across the processor. Don’t wipe it around; just let physics do the work. As you fasten the cooler to your CPU, you may notice some paste coming out from the sides: that’s a good thing. It just means you used too much paste, so just clean it off and you’re done! In the event, you don’t have to clean any off, just to be sure, continue to step 4.
4. (Recommended, but optional) Detach the cooler to confirm the CPU is covered
It’s easy to not use enough thermal paste, so just to be safe, remove the cooler head to visually confirm that the CPU is covered. Don’t worry if it looks spread too thin; if the entire chip is covered on top, it’s a job well done. If you see gaps, repeat steps 2 and 3 with half of the original amount of paste.
How to clean off thermal paste?
To clean off thermal paste, first, turn off and unplug your computer. Remove the heat sink carefully. Use a lint-free cloth or coffee filter with isopropyl alcohol (at least 90%) to gently wipe away the thermal paste from the CPU and heat sink. Make sure all residue is gone. Let it dry completely before applying new paste and reattaching the heat sink.
How many grams of thermal paste per CPU?
For a GPU, apply a small, pea-sized amount of thermal paste in the center of the GPU die. Spread it evenly with a plastic card or let the pressure of reattaching the heat sink spread it. Use just enough to cover the surface with a thin layer. Too much paste can reduce cooling efficiency and cause spills. You typically need 1 to 2 grams of thermal paste to achieve the perfect amount of thermal paste for your CPU.
How often should I replace thermal paste?
Replace thermal paste every 2 to 3 years, or if you notice higher temperatures or have removed the cooler. Regular checks can help ensure optimal cooling performance and prevent overheating.
Are there alternatives from thermal paste?
Alternatives to thermal paste include thermal pads and liquid metal. These materials also help improve heat transfer between components but have different application and performance characteristics. But thermal paste is generally more effective than thermal pads for filling tiny gaps and ensuring good heat transfer between the CPU/GPU and the cooler.
How long does thermal paste last?
Thermal paste usually lasts 2 to 5 years, depending on how good it is and how your system runs. It can dry out or wear out over time, making it less effective. Regular checks and replacement keep your system cooling well.
Tips and Important Notes
- There are plenty of different types of thermal paste, and lots of manufacturers. Do the research, especially if your AIO does not come with thermal paste. Not all are created equal.
- Thermal paste retains its conductivity for a long time, but it’s recommended to clean it off annually and replace it with fresh paste. That said, you can keep any leftover in the tube/packet in a cool drawer or safe place, and it’ll keep.
- Make sure before powering your rig on that there’s no thermal paste anywhere except the CPU.
- Don’t be price gauged if you’re out of paste; more expensive paste isn’t necessarily any better than a cheaper paste.
- All Asetek-powered AIOs come with a pre-applied thermal compound that is single-use only. A new thermal paste will be needed when building a new system or even remounting the AIO to the same system.
- Partners like Phanteks also bundle a tube with their AIO CPU cooler solutions. This makes it super easy to re-use that same AIO for a new system build or rebuild.


 Back to articles

